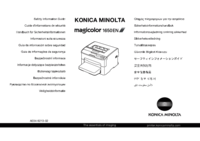
Konica Minolta magicolor 1650EN manuals

Owner’s manuals and user’s guides for Printers Konica Minolta magicolor 1650EN.
We providing 4 pdf manuals Konica Minolta magicolor 1650EN for download free by document types: User Manual


Table of contents

Reference Guide

1

Copyright Notice

2

Trademarks

2

SOFTWARE LICENSE AGREEMENT

3

About Adobe Color Profile

4

(TOYO Offset Coated 2.1)

6

OpenSSL Statement

9

Original SSLeay License

10

NetSNMP License

11

WPA Supplicant

15

Contents

16

Contentsx-16

17

Contents x-17

18

Contentsx-18

19

Contents x-19

20

Contentsx-20

21

Mac OS X

22

Installing the Printer Driver

24

3 Click Continue

25

4 Click Continue

25

Installation starts

27

When Using a USB Connection

29

9 Click Add

31

8 Click Add

33

10 Click Add

36

IP Printing Setting

42

(Mac OS X 10.4)

45

6 Click Add

46

Bonjour Setting

47

8 Click Continue

49

4 Click IP Printer

50

10 Click Continue

53

3 Click Print & Fax

54

7 Click Add

56

9 Click Continue

57

Name list

59

5 Click IP

62

11 Click Continue

64

Selecting Print Options

65

5 Click Apply Changes

66

2 Click Print & Fax

67

4 Select Driver tab

67

6 Click OK

68

Page Attributes Options

70

Specifying Custom Paper Size

71

Print Dialog Box

72

Common buttons

73

Copies & Pages

74

 Pages per Sheet

75

 Layout Direction

75

 Border

75

 Two-Sided

75

Scheduler

76

Paper Handling

77

ColorSync

78

Cover Page

78

Error Handling

79

Paper Feed

80

Color Options

81

Advanced Color Options/Image

82

Advanced Color Options/Text

83

Color Matching

91

 Simulation Profiles

100

 Match Paper Color

100

 CMYK Gray Treatment

100

 Hide Advanced Options

100

 Manage Profile

100

Printer Features

101

Supply Levels

101

Troubleshooting

103

Troubleshooting 1-83

104

Troubleshooting1-84

105

Operation on

106

4 Quit Terminal

108

Adding the Printer

109

1 Start up the Web browser

109

3 Click Add Printer

109

4 Enter the user name and

109

" Example:

110

10 Select KONICA MINOLTA

111

3 Click Configure Printer

112

Printer Driver Settings

113

Graphics Options

114

Image Options

114

Options Installed

115

Simulation Options

115

Text Options

115

Printing a Document

117

3 Enter the command “lpr -P”

117

1 From the main menu, select

118

2 Click New Printer

118

4 Click Import

119

5 Click Browse

119

6 In the Path, enter “/usr/

119

Printing a Document 2-15

120

15 Select the name of the

121

16 Click OK

121

Checking Print Jobs

122

3 Click Manage Jobs

122

Printing With NetWare3-2

125

Emulation

125

Printing With NetWare 3-3

126

Printing With NetWare3-4

127

Printing With NetWare 3-5

128

Printing With NetWare3-6

129

2 Start up NWadmin

130

Printing With NetWare3-8

131

Printing With NetWare 3-9

132

NetWare Server

132

Printing With NetWare3-10

133

Management

134

Utilities

134

Understanding

136

Configuration

136

Ethernet Menu

137

Ethernet Menu 5-3

138

Ethernet Menu5-4

139

Accessing the Ethernet Menu

139

Ethernet Menu 5-5

140

Ethernet Menu5-6

141

Ethernet Menu 5-7

142

Ethernet Menu5-8

143

Ethernet Menu 5-9

144

Ethernet Menu5-10

145

Network Printing

146

Network Connection

147

Network Connection 6-3

148

Making the Connection

148

Network Connection6-4

149

Network Connection 6-5

150

Network Connection6-6

151

Network Connection 6-7

152

Network Connection6-8

153

Network Printing6-10

155

Network Printing 6-11

156

Network Printing6-12

157

Network Printing 6-13

158

Network Printing6-14

159

Network Printing 6-15

160

9 Click Finish

161

Network Printing 6-17

162

4 Choose Have Disk

163

5 Choose Browse

163

7 Click OK

164

8 Click OK

164

10 Click Finish

165

2 Click Add a printer

166

6 Click Have Disk

167

7 Click Browse

168

9 Click OK

168

10 Click OK

168

11 Click Next

169

12 Click Finish

169

Network Printing 6-25

170

Network Printing6-26

171

Network Printing 6-27

172

9 Click Browse

173

12 Click Close

173

Network Printing 6-29

174

8 Click Next

175

Network Printing 6-31

176

13 Click Browse

177

15 Click Next

177

16 Click Close

177

17 Click Next

178

19 Click Finish

179

Network Printing 6-35

180

Windows Server 2008)

180

Network Printing6-36

181

6 Click Additional Drivers

182

10 Click Open

183

Troubleshooting6-40

185

Using PageScope

186

Web Connection

186

Display Language

187

Requirements

187

1 Click the Start button

188

5 Click the OK button

188

Determining the Printer Name

189

Connection Window

192

Current Status

193

Login Page

194

Public Mode

194

User Mode

194

2 Click the Login button

195

System Page

196

Summary (shown above)

196

Operator Control

198

MAIN MENU - PAPER MENU

202

INPUT TRAY - CUSTOM

202

SIZE - LENGTH(XX)

202

Tray Mapping

203

INPUT TRAY - MAP - LOGICAL

204

TRAY 0 - 9

204

Color & Quality

205

MAIN MENU - QUALITY MENU

206

TONER OUT ACTION

206

Print System Pages

207

Supplies Status

208

Online help

209

Item Description

210

Configuration Page

211

Statistics Page

212

Job Page

213

Direct Printing

214

Download Manager

215

Print Page

216

Default Setting

218

MAIN MENU - SYSTEM DEFAULT

220

EMULATIONS - POSTSCRIPT

220

ERROR PAGE

220

MAIN MENU - INTERFACE MENU

220

ETHERNET - PS PROTOCOL

220

EMULATIONS - PCL - LINE

222

TERMINATION

222

List Fonts

224

PCL Fonts

225

List Directories

226

Administration

244

ENERGY SAVER

245

STARTUP OPTIONS - START PAGE

245

RESTORE/SAVE

246

Localization Languages

247

Security

249

SECURITY - CONFIG - SET

250

ADMIN PASSWD

250

Flash Operations

251

Network Page

265

TCP/IP (shown previous page)

266

MAIN MENU - INTERFACE MENU

268

- ETHERNET - TCP/IP - IPV6

268

- ENABLE

268

IP Address Filtering

271

- ETHERNET - IP SERVICES

272

DISABLE FILTERS

272

DISABLE IPSEC

274

IPsec (IKE Edit)

276

Network - IPsec page

278

IPsec (IP Address Edit)

279

WSD Print

280

ETHERNET - IPX/SPX - FRAME

283

Time Synchronize

295

SSL/TLS Setting

297

Request a Certificate

301

Install a Certificate

304

Encryption Strength

305

Remove Certificate

306

SSL/TLS Mode

307

INTERFACE MENU - ETHERNET

308

DISABLE 802.1X

308

Index7-128

313

Index 7-129

314

Index7-130

315

Index 7-131

316

Index7-132

317

Table of contents

User’s Guide

1

Thank You

2

Trademarks

2

Copyright Notice

2

SOFTWARE LICENSE AGREEMENT

3

About Adobe Color Profile

4

(TOYO Offset Coated 2.1)

6

OYO INK MFG. CO., LTD. 2004

7

For EU member states only

9

Contents

10

Contentsx-10

11

Contents x-11

12

Contentsx-12

13

Space Requirements

15

Printer Parts

17

Rear View

18

Front View with Options

19

Rear View with Options

20

Printer Driver CD/DVD

21

Utilities

22

Documentation

23

System Requirements

24

System Requirements1-12

25

Using the Printer

26

– (Windows Server 2008/Vista)

27

– (Windows XP/Server 2003)

27

– (Windows 2000)

27

11 Click Apply

28

Windows Server 2008/Vista

30

Windows XP/Server 2003

30

Windows 2000

30

Common Buttons

31

 Print a mirror image

32

Basic Tab

33

Layout Tab

33

Cover Page Tab

33

Watermark/Overlay Tab

33

Quality Tab

34

Other Tab

34

Point and Print

35

Using the Status

36

(Windows Only)

36

Operating Environment

37

Opening the Status Monitor

37

Using the Status Monitor

37

Closing the Status Monitor

38

Closing the Status Monitor3-4

39

Printer Control

40

Panel and

40

Configuration

40

About the Control Panel

41

About the Control Panel 4-3

42

About the Control Panel4-4

43

Toner Supply Indicators

43

Configuration Menu Overview

44

MAIN MENU

45

PAPER MENU

47

QUALITY MENU

52

INTERFACE MENU

56

DEFAULT” on page 4-22

57

SYSTEM DEFAULT

61

SERVICE MENU

65

LANGUAGE MENU

66

Media Handling

68

Print Media

69

Media Types

70

Media Types5-4

71

Thick Stock

71

Media Types 5-5

72

Envelopes

72

Media Types5-6

73

Media Types 5-7

74

Letterhead

74

Postcards

74

Printable Area

75

Printable Area 5-9

76

Page Margins

76

Loading Media

77

Loading Media 5-11

78

5 Reattach the dust cover

79

" Before loading enve

81

Loading Media 5-15

82

2 Remove any media from the

83

6 Reattach the dust cover

84

3 Remove the lid from Tray 2

85

6 Reattach the lid to Tray 2

86

Loading Media5-20

87

Duplexing

88

3 Click OK

89

Output Tray

89

Media Storage

90

Media Storage5-24

91

Replacing

92

Consumables

92

Replacing Consumables

93

Replacing Consumables 6-3

94

Replacing Consumables6-4

95

Replacing Consumables 6-5

96

Replacing Consumables6-6

97

Replacing Consumables6-8

99

7 Remove the cover from the

100

10 Close the front cover

101

Replacing Consumables 6-11

102

Replacing Consumables6-12

103

2 Open the front cover

104

Replacing Consumables6-14

105

4 Close the front cover

106

1 Open the top cover

107

Replacing Consumables 6-17

108

Replacing Consumables6-18

109

2 Open the top cover

110

Replacing Consumables6-20

111

5 Prepare a new fuser unit

112

7 Remove the fuser separator

113

Replacing Consumables 6-23

114

Replacing Consumables6-24

115

Maintaining the

116

Maintaining the Printer

117

Maintaining the Printer 7-3

118

33.3 lbs

118

Cleaning the Printer

119

Cleaning the Printer7-6

121

Cleaning the Printer 7-7

122

Cleaning the Printer7-8

123

Cleaning the Printer 7-9

124

Cleaning the Printer7-12

127

Cleaning the Printer 7-13

128

Cleaning the Printer7-14

129

9 Close the top cover

130

Cleaning the Printer7-16

131

13 Close the front cover

132

Cleaning the Printer7-18

133

Cleaning the Printer 7-19

134

Cleaning the Printer7-20

135

Cleaning the Printer 7-21

136

1 Open the duplex cover

137

Troubleshooting

138

Introduction

139

Printing a Configuration Page

139

CONFIGURATION

140

Preventing Media Misfeeds

141

Understanding the Media Path

142

Clearing Media Misfeeds

142

Clearing Media Misfeeds8-6

143

Clearing Media Misfeeds8-8

145

Clearing Media Misfeeds 8-9

146

" If the media cannot

147

" Remove the dust

147

Clearing Media Misfeeds 8-11

148

5 Return the fuser separator

149

1 Remove the dust cover from

150

3 Reattach the dust cover

150

4 Press the Menu Select key

150

3 Remove any misfed paper

151

Clearing Media Misfeeds 8-15

152

8 Reinsert Tray 2

153

" If the media misfeed

154

3 Close the duplex cover

155

Solving Other Problems

158

Solving Other Problems8-22

159

Solving Other Problems 8-23

160

Solving Other Problems8-24

161

MAIN MENU/QUAL

167

ITY MENU/AIDC/REQUEST

167

Standard Status Messages

168

" Printing can

169

" If the MAIN MENU/

172

Service Messages

173

Installing

174

Accessories

174

Tray 2 9-3

176

Installing Tray 2

176

Tray 29-4

177

Tray 2 9-5

178

Duplex Option

179

2 Remove the dust cover from

180

3 Prepare the attachment

180

3 Prepare the duplex option

181

4 Install the duplex option

182

5 Open the duplex cover

182

Duplex Option9-10

183

Appendix

184

Technical Specifications

185

Technical Specifications A-3

186

Technical SpecificationsA-4

187

Technical Specifications A-5

188

Index A-7

190

IndexA-8

191

Table of contents

Guida utente

1

Marchi di fabbrica

2

Avviso di Copyright

2

ACCORDO DI LICENZA SOFTWARE

3

(TOYO Offset Coated 2.1)

6

STANDARD DIC

7

Sommario

10

Sommariox-10

11

Sommario x-11

12

Sommariox-12

13

Sommario x-13

14

Sommariox-14

15

Ingombro

17

Parti della stampante

19

Vista posteriore

20

CD/DVD Printer Driver

23

Documentazione

25

Requisiti del sistema

26

Requisiti del sistema1-12

27

Uso del driver

28

MINOLTA mc1650 PS)

31

– (Windows 2000)

31

Windows 7/Server 2008 R2

32

Windows Server 2008/Vista

32

Windows XP/Server 2003

32

Windows 2000

32

Pulsanti comuni

33

Registro Impostazioni di base

35

Registro Layout

35

Registro Frontespizio

36

Registro Filigrana/Overlay

36

Registro Qualità

37

Registro Altri

37

Uso del monitor

38

Windows)

38

Ambiente operativo

39

Apertura del monitor di stato

39

Uso del monitor di stato

39

Chiusura del monitor di stato

41

Pannello di

42

Indicatori del toner

45

Configurazione/Abilita

46

Menu principale

47

MENU CARTA

49

MENU QUALITA'

54

Reinizializza

58

Val Pred Sistema

63

" 2 Ore

66

MENU LINGUA

68

Trattamento della

70

Materiale di stampa

71

Tipi di carta

72

Tipi di carta5-4

73

 Busta C6 o busta DL

74

Tipi di carta5-6

75

Etichette

75

Tipi di carta 5-7

76

Etichette su tutto il

76

Corretto

76

Tipi di carta5-8

77

Carta intestata

77

Cartoline

77

Area stampabile

78

Area stampabile5-10

79

Buste da lettera

79

Margini della pagina

79

Caricamento della carta

80

Caricamento della carta5-12

81

5 Riapplicare il coperchio

82

Caricamento della carta5-14

83

6 Riapplicare il coperchio

84

Caricamento della carta5-16

85

Caricamento della carta 5-17

86

4 Premere sulla piastra di

89

Caricamento della carta 5-21

90

Stampa duplex

91

3 Fare clic su OK

92

Vassoio di uscita

92

Magazzinaggio della carta

93

Sostituzione dei

94

Cartucce di toner

95

Verificare che il

101

8 Allineare il perno su ogni

102

Aprire il coperchio frontale

106

Quindi viene visualizzato

106

5 Richiudere con cautela il

110

1 Spegnere la stampante e

111

7 Togliere il materiale dei

114

9 Dopo aver installato

116

10 Richiudere con cautela il

116

11 Ricollegare il cavo di

116

Manutenzione

118

Manutenzione della stampante

119

33.3 lbs

120

Pulizia della stampante

122

Pulizia della stampante7-6

123

Pulizia della stampante 7-7

124

Pulizia della stampante7-8

125

Pulizia della stampante7-10

127

Pulizia della stampante 7-11

128

Pulizia della stampante7-12

129

Pulizia della stampante 7-13

130

Pulizia della stampante7-14

131

Pulizia della stampante 7-15

132

9 Richiudere il coperchio

133

Pulizia della stampante 7-17

134

Pulizia della stampante7-18

135

3 Sollevare la stampante dal

136

5 Sollevare la stampante e

137

3 Sollevare la stampante

138

3 Richiudere con cautela il

140

Pulizia della stampante7-24

141

Soluzione di

142

Introduzione

143

MENU STAMPA

144

CONFIGURAZIONE

144

SI'

144

IN ATTESA

144

Se nel vassoio di uscita i

148

Rimuovere la carta inceppata

151

7 Richiudere con cautela il

153

3 Riapplicare il coperchio

154

1 Aprire il più possibile il

155

2 Sollevare il vassoio 2 per

155

5 Sventagliare la carta ed

156

6 Premere sulla piastra di

156

8 Reinserire il vassoio 2

157

Risoluzione di altri problemi

163

SCORRETTO

164

Aggiorna immagine

172

Messaggi di stato standard

174

Toner X scarso

177

Toner X esaurito

177

Messaggi di servizio

181

Installazione di

182

Vassoio 2

184

Vassoio 29-4

185

9 Ricollegare il cavo di

186

Unità duplex opzionale

187

4 Sollevare la stampante e

188

Unità duplex opzionale 9-9

190

7 Ricollegare il cavo di

191

Appendice

192

Specifiche tecniche

193

Specifiche tecniche A-3

194

Specifiche tecnicheA-4

195

Specifiche tecniche A-5

196

Indice A-7

198

IndiceA-8

199


More products and manuals for Printers Konica Minolta

Models Document Type
bizhub C250 User Manual   Konica Minolta bizhub C250 Manuale d'uso, 376 pages
bizhub PRO C6500P User Manual   Konica Minolta bizhub PRO C6500P Manuale d'uso, 28 pages
bizhub C364e User Manual   Konica Minolta bizhub C364e Manuale d'uso, 1 pages
MAGICOLOR 4695MF User Manual   Konica Minolta MAGICOLOR 4695MF Manuale d'uso, 124 pages
bizhub C252P User Manual   Konica Minolta bizhub C252P Manuale d'uso, 522 pages
magicolor 5570 User Manual   Konica Minolta magicolor 5570 Manuale d'uso, 12 pages
bizhub PRO 1050P User Manual   Konica Minolta bizhub PRO 1050P Manuale d'uso, 596 pages
bizhub PRO 950 User Manual   Konica Minolta bizhub PRO 950 Manuale d'uso, 304 pages
IC-402 User Manual   Konica Minolta IC-402 Manuale d'uso, 28 pages
magicolor 5570CK User Manual   Konica Minolta magicolor 5570CK Manuale d'uso, 296 pages
bizhub PRESS C1085 User Manual   Konica Minolta bizhub PRESS C1085 Manuale d'uso [en] , 48 pages
bizhub 601 User Manual   Konica Minolta bizhub 601 Manuale d'uso, 282 pages
BIZHUB C252 User Manual   Konica Minolta BIZHUB C252 Manuale d'uso, 736 pages
magicolor 7460CK User Manual   Konica Minolta magicolor 7460CK Manuale d'uso, 497 pages
BIZHUB C351 User Manual   Konica Minolta BIZHUB C351 Manuale d'uso, 708 pages
PagePro 1490MF User Manual   Konica Minolta PagePro 1490MF Manuale d'uso, 91 pages
bizhub C252P User Manual   Konica Minolta bizhub C252P Manuale d'uso, 438 pages
bizhub 20 User Manual   Konica Minolta bizhub 20 Manuale d'uso, 31 pages
bizhub 36 User Manual   Konica Minolta bizhub 36 Manuale d'uso, 3 pages
IC-402 User Manual   Konica Minolta IC-402 Manuale d'uso, 28 pages